
Truly Understanding Dependency Injection and Inversion of Control in iOS
Welcome! If you are developing iOS applications, mastering Dependency Injection in iOS is a critical skill. You have likely heard this term, along with Inversion of Control, thrown around quite a bit. Today, we are going to break down these concepts entirely. I can assure you that mastering these principles will transform your code from a tangled mess into a clean, testable, and highly professional masterpiece.
Let us dive right in and explore how you can elevate your Swift projects.
What is Dependency Injection (DI)?
Dependency Injection is a technique where a component (such as a class, struct, function, or view) does not create the dependencies it needs internally. Instead, it receives them from the outside.
Simply put, a class using DI essentially says: “I do not manufacture my dependencies; they must be provided to me.”
Furthermore, Dependency Injection is not exactly a standalone Design Pattern. It is actually a technique used to implement the Inversion of Control (IoC) principle. Inversion of Control means taking the control away from the object itself and handing it to an external system.
If we want a more technical and analytical definition, we can say this: DI takes the responsibility of managing dependencies out of the class and transfers it to the client calling it or to a higher layer known as the Composition Root. This effectively brings the 5th rule of SOLID principles to life, which is the Dependency Inversion Principle (DIP). DIP states that high-level modules should not depend on low-level modules; both should depend on abstractions like Protocols or Interfaces.
Why Do We Need Dependency Injection?
1. Decoupling (Loose Coupling)
When you use DI, your classes do not need to know “how” another class is created. They only need to know “what” it does through a Protocol. This ensures that when you change one part of your code, the other parts do not break.
The Bad Approach (Tight Coupling):
// ❌ BAD: The ViewModel knows exactly how the NetworkService is created.
// If NetworkService changes, the ViewModel breaks.
final class HomeViewModel {
    private let service = NetworkService()

    func load() {
        service.fetchData()
    }
}
The Good Approach (Decoupling + Protocol):
// ✅ GOOD: The ViewModel only knows the Protocol.
// It is loosely coupled, making it easy to test, mock, and swap.
protocol NetworkServiceProtocol {
    func fetchData()
}

final class NetworkService: NetworkServiceProtocol {
    func fetchData() {}
}

final class HomeViewModel {
    private let service: NetworkServiceProtocol

    init(service: NetworkServiceProtocol) {
        self.service = service
    }

    func load() {
        service.fetchData()
    }
}
2. Testability (The Most Critical Reason)
This is perhaps the biggest win for your architecture. If a class creates its own APIClient internally, you simply cannot test that class without an active internet connection. Thanks to DI, we can inject a fake MockAPIClient instead of the real one during our unit tests.
Without DI (Untestable):
// ❌ BAD: Makes real network calls. No offline testing. Not deterministic.
final class ProfileViewModel {
    private let apiClient = APIClient()

    func loadProfile() async {
        await apiClient.fetchProfile()
    }
}
With DI (Testable with Mocks):
// ✅ GOOD: DI allows us to inject a Mock object.
// Tests run without internet or real APIs, making them fast and reliable.
protocol APIClientProtocol {
    func fetchProfile() async
}

final class MockAPIClient: APIClientProtocol {
    func fetchProfile() async {
        print("Mock response")
    }
}

final class ProfileViewModel {
    private let apiClient: APIClientProtocol

    init(apiClient: APIClientProtocol) {
        self.apiClient = apiClient
    }

    func loadProfile() async {
        await apiClient.fetchProfile()
    }
}

// Unit Test Example
func test_profile_loaded() async {
    let mockClient = MockAPIClient()
    let viewModel = ProfileViewModel(apiClient: mockClient)

    await viewModel.loadProfile()
}
3. Single Responsibility Principle (SRP)
A class should have only one reason to change. For example, a ViewModel’s job is to fetch and process data. Its job is not to create and configure network services. The task of object creation must be separated from business logic.
SRP Violation:
// ❌ BAD: This class handles payment logic, service creation, and configuration.
final class PaymentsViewModel {
    private let service: PaymentService

    init() {
        let session = URLSession(configuration: .default)
        self.service = PaymentService(session: session)
    }
}
SRP Compliant:
// ✅ GOOD: The ViewModel only handles business logic. Creation is done externally.
final class PaymentsViewModel {
    private let service: PaymentServiceProtocol

    init(service: PaymentServiceProtocol) {
        self.service = service
    }
}

// Composition Root (The Outside World)
let session = URLSession(configuration: .default)
let service = PaymentService(session: session)
let viewModel = PaymentsViewModel(service: service)
4. Late Binding and Runtime Configuration
DI allows us to change the behavior of our application while it is running. For instance, you can inject a ConsoleLogger if the app is in Debug mode, and a CloudLogger if it is in Release mode.
protocol Logger {
    func log(_ message: String)
}

final class ConsoleLogger: Logger {
    func log(_ message: String) {
        print(message)
    }
}

final class CloudLogger: Logger {
    func log(_ message: String) {
        // Send logs to the server
    }
}

final class AnalyticsViewModel {
    private let logger: Logger

    init(logger: Logger) {
        self.logger = logger
    }

    func track() {
        logger.log("Event tracked")
    }
}

// Runtime Selection
#if DEBUG
let logger = ConsoleLogger()
#else
let logger = CloudLogger()
#endif

let viewModel = AnalyticsViewModel(logger: logger)
Is Inversion of Control (IoC) Just Dependency Injection?
Absolutely not. DI is the most popular way to apply IoC, but it is not the only way. As iOS developers, we actually use IoC almost every single day, even if we do not realize it.
To truly understand this, we need to look at the difference between a Library and a Framework.
Library vs. Framework
- Using a Library (No IoC): If we write
AF.request(...)using Alamofire, we are in control. We call the functions whenever we want. - Using a Framework like UIKit or SwiftUI (IoC Exists): We never call
viewDidLoad()ourselves. We do not trigger a UITableView’sdidSelectRowmethod. Apple’s UIKit framework calls theoverride func viewDidLoad()code that we wrote.
Here, the control belongs to UIKit. The flow is inverted: The Framework calls our code.
Let us look at the Delegate Pattern as a prime example of IoC. With a TableView, the control is entirely in the hands of the framework. We never manually call the cellForRowAt function in our code. Whenever the TableView needs data while scrolling, it triggers our function. It says to us “give me the data for the next cell”. The authority to call the function is not ours; it belongs to the TableView.
The Philosophy Behind IoC (A Quick Summary)
1. The Core Principle
An object should not exhaust itself creating the environment it needs to work (like Databases or Network layers). Instead, this environment should be served on a silver platter. The class does not worry about where to find the tools; it simply says “give me the tools, and I will do my job.”
2. Implementation Patterns
We apply this philosophy in our code through three main patterns:
- Dependency Injection: We do not create objects internally; we take them as parameters from the outside.
- Observer Pattern and Events: We do not constantly ask “is the job done?”. We say “let me know when it is done” and wait (using Delegates or NotificationCenter).
- Template Method: Apple provides the skeleton (UIKit/SwiftUI) and tells us “just fill in these blanks like viewDidLoad”. The framework manages the overall flow.
3. The Ultimate Goal
Our main objective is Modularity. If we hardcode the control inside a class, we cannot extract that class and use it in another project or test environment. It becomes stuck. But if we externalize the control, that class becomes like a plugin. You can attach it to any project, and it works flawlessly.
In short, IoC is about taking the control of flow and dependencies out of the class and handing it over to the system. Wherever you see an init(service: ServiceProtocol) in your code, you should know that the IoC philosophy is being applied there using the Dependency Injection technique.
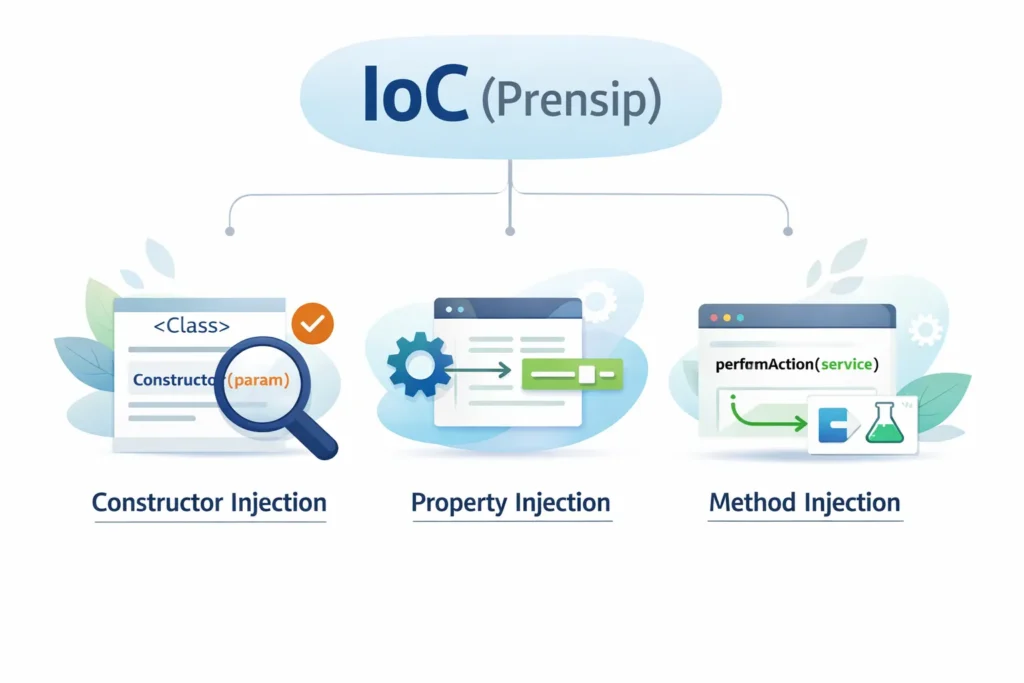
The 3 Core Methods of Implementing DI
When applying the IoC principle through DI, we generally use one of three methods:
- Constructor Injection (Highly Recommended): The dependency is provided through the
initmethod. - Property Injection: The dependency is defined as a
varand assigned later. We often use this when working with Storyboards because we cannot easily modify the custominitmethod. - Method Injection: The dependency is provided as a parameter only when a specific function is called.
Why is Constructor Injection the Recommended Approach?
- Compile-Time Safety: If the dependency is not provided when the object is created, the code simply will not compile. You catch errors immediately.
- Immutability: We can define our dependencies as
letconstants. Once the object is created, its dependencies cannot be accidentally changed. - Crystal Clear Dependencies: By just looking at the
initmethod, it is glaringly obvious exactly what that class needs to function.
Deep Dive: A Real-World Swift Strategy Example
To solidify everything we just talked about, let us look at a comprehensive example using the Strategy Pattern powered by Dependency Injection.
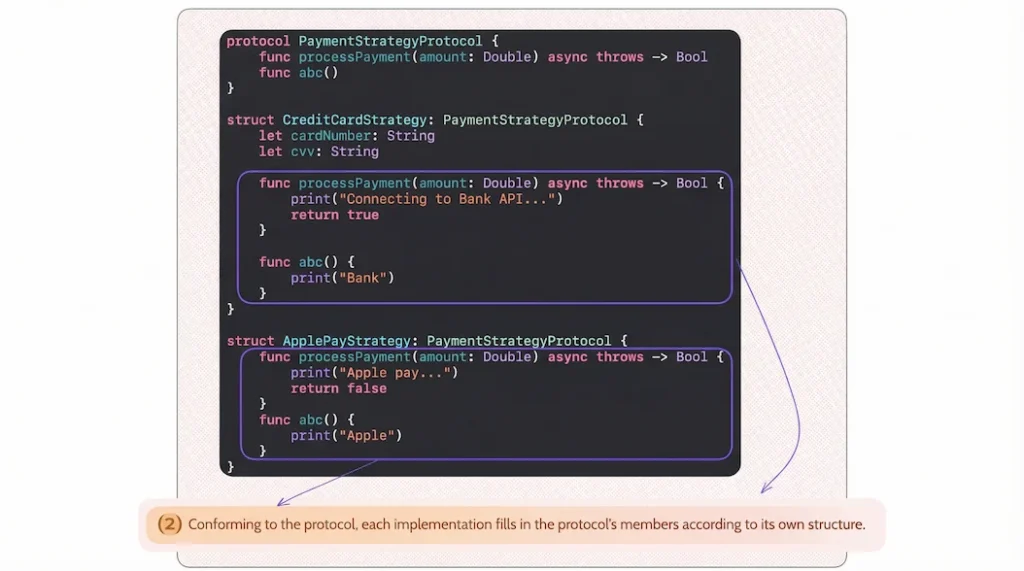
protocol PaymentStrategyProtocol {
func processPayment(amount: Double) async throws -> Bool
func abc()
}
struct CreditCardStrategy: PaymentStrategyProtocol {
let cardNumber: String
let cvv: String
func processPayment(amount: Double) async throws -> Bool {
print("Connecting to Bank API...")
return true
}
func abc() {
print("Bank")
}
}
struct ApplePayStrategy: PaymentStrategyProtocol {
func processPayment(amount: Double) async throws -> Bool {
print("Apple pay....")
return false
}
func abc() {
print("Apple")
}
}
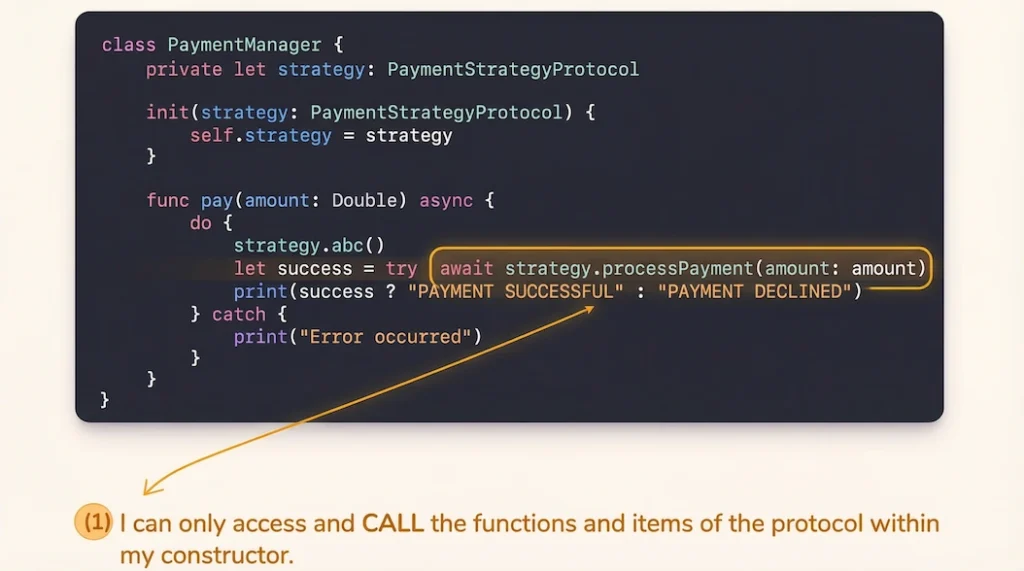
class PaymentManager {
private let strategy: PaymentStrategyProtocol
// 1. We only have access to the protocol's elements inside the constructor.
init(strategy: PaymentStrategyProtocol) {
self.strategy = strategy
}
func pay(amount: Double) async {
do {
strategy.abc()
let success = try await strategy.processPayment(amount: amount)
print(success ? "PAYMENT SUCCESSFUL" : "PAYMENT DECLINED")
} catch {
print("Error occurred")
}
}
}
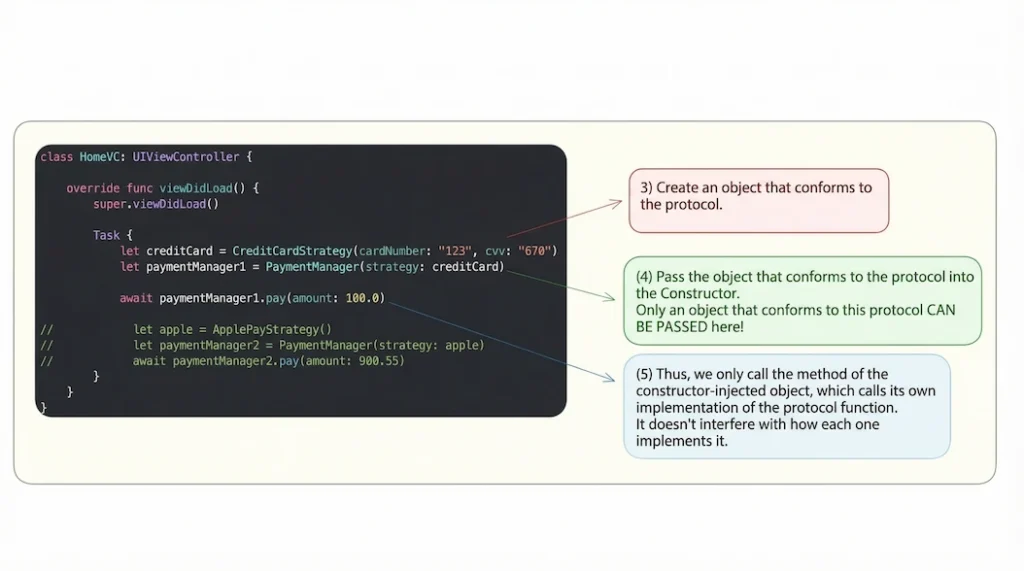
class HomeVC: UIViewController {
override func viewDidLoad() {
super.viewDidLoad()
Task {
// 2. We create an object that conforms to the Protocol.
let creditCard = CreditCardStrategy(cardNumber: "123", cvv: "670")
// 3. We inject that conforming object directly into the Constructor.
let paymentManager1 = PaymentManager(strategy: creditCard)
await paymentManager1.pay(amount: 100.0)
// 4. We can easily swap out the behavior without touching PaymentManager!
let apple = ApplePayStrategy()
let paymentManager2 = PaymentManager(strategy: apple)
await paymentManager2.pay(amount: 980.55)
}
}
}
In this setup, the PaymentManager does not care how a credit card is processed or how Apple Pay works. It just blindly trusts the PaymentStrategyProtocol. This is professional, scalable, and beautifully decoupled code.


One Comment